Base layout climbing volumes: logos and multi-form sets
Want a set of climbing volumes that read as one silhouette — a logo, a wordmark, or any floor-plan arrangement? Use From base layout in the VOLUME designer: draw or import 2D footprints on a shared canvas, confirm, and each region becomes its own 3D form on the same plane.
What this feature is for
A normal volume starts from one parametric outline. A base layout starts from several outlines at once. Typical uses:
- Logo or brand mark split into separate climbable pieces
- “Living” formations — clusters of volumes that sit side by side like a single composition
- Any floor plan you already have as SVG, PNG, or JSON polygons
Footprints stay locked to the layout after confirm. You still tune height, slope, thickness, and T-nuts per volume. Stackables stay off in this mode — these forms share a plane, they do not nest vertically.
Step-by-step: create a layout set
1. Start a new design
- Go to /design.
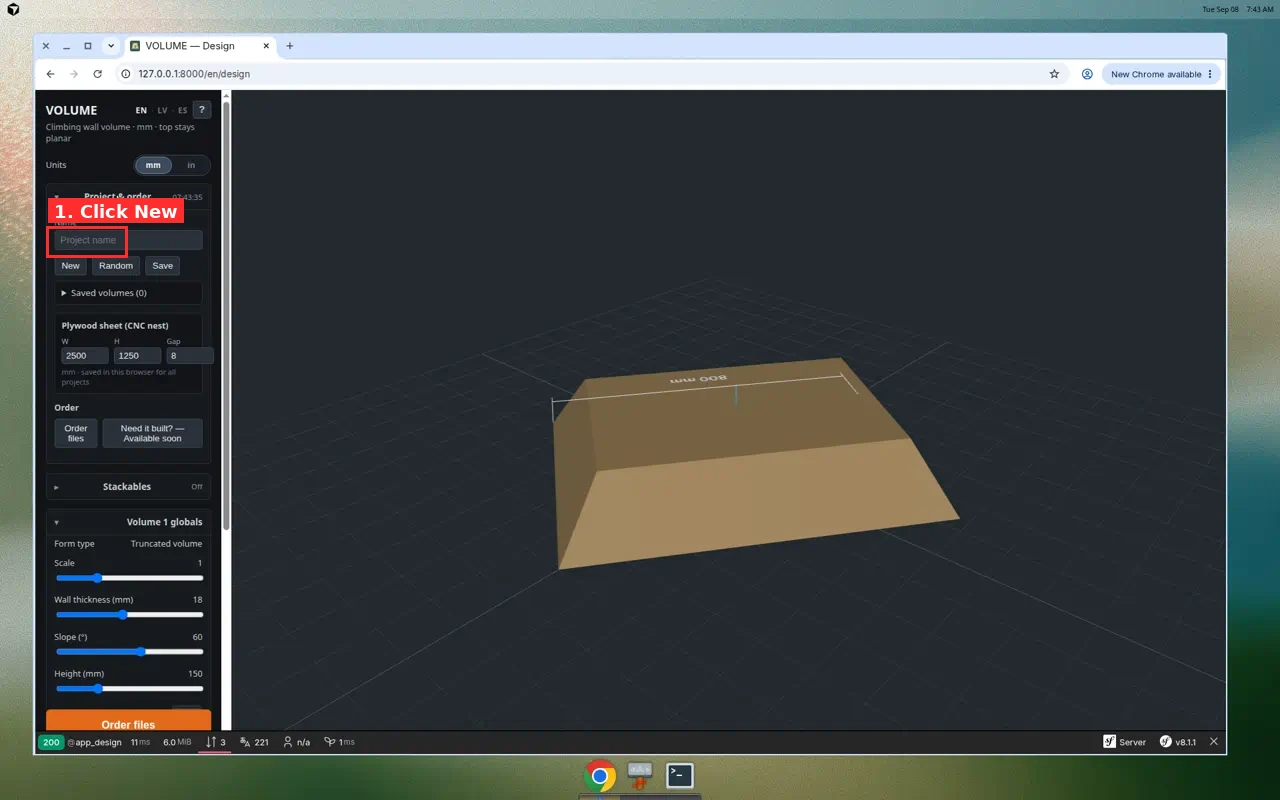
- In Project & order, click New (red highlight in the screenshot above).
2. Choose “From base layout”
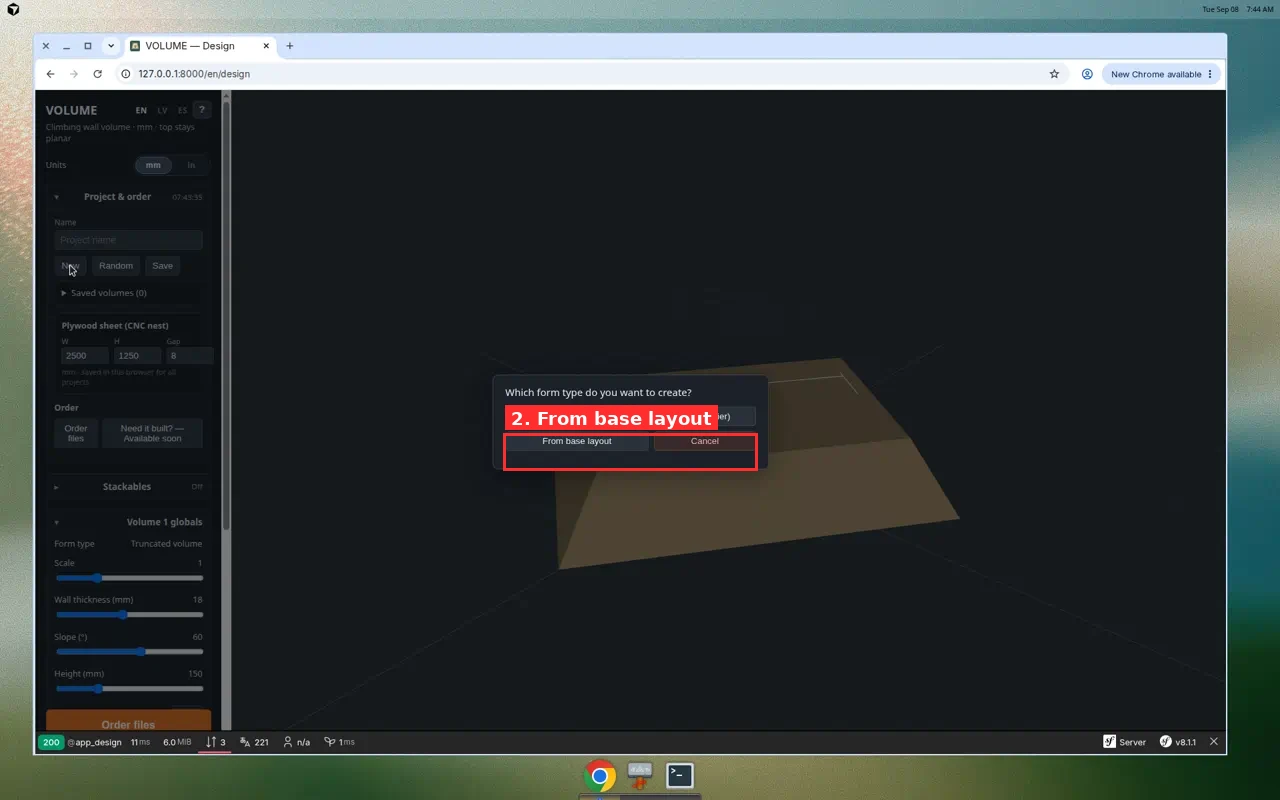
The dialog asks which form type you want:
- Truncated volume — classic frustum with a flat top
- Pyramid (free tier) — tip, no top face
- From base layout — open the shared 2D canvas ← pick this
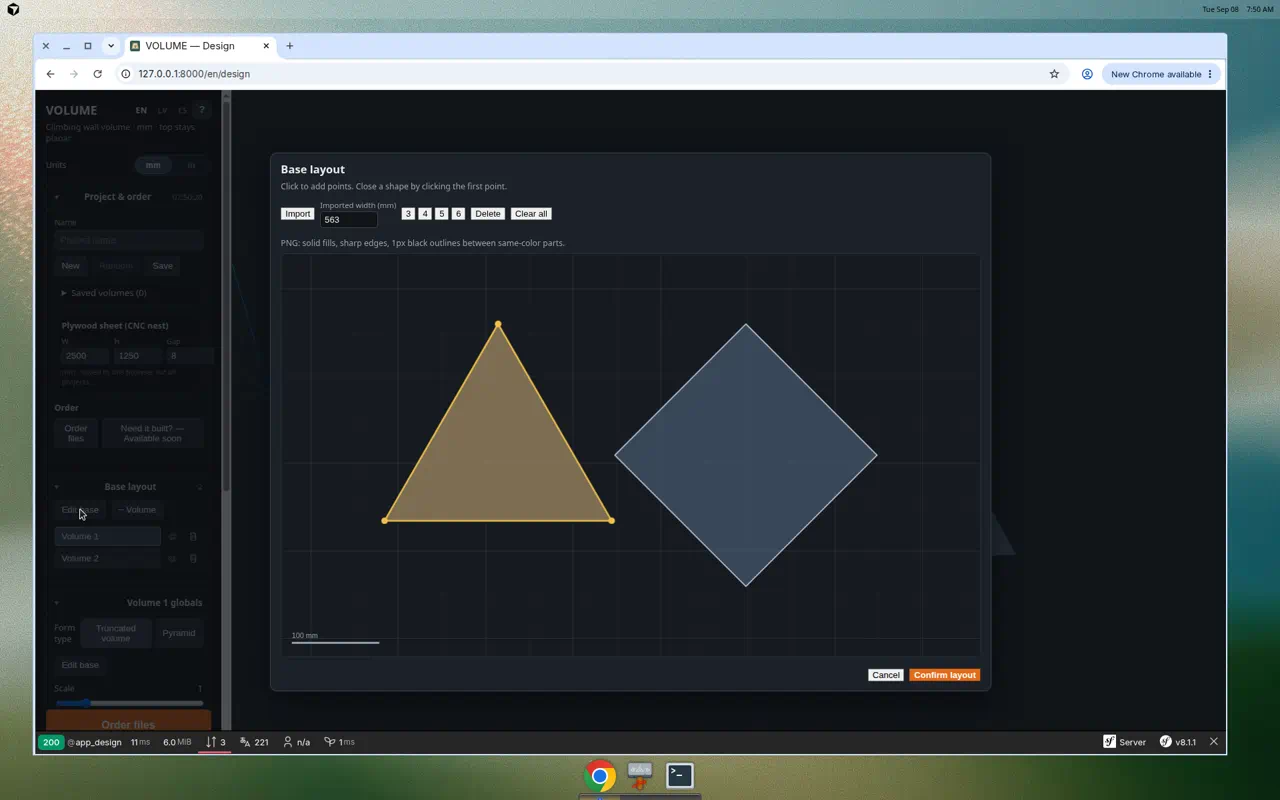
3. Build footprints on the canvas
You can mix drawing and import:
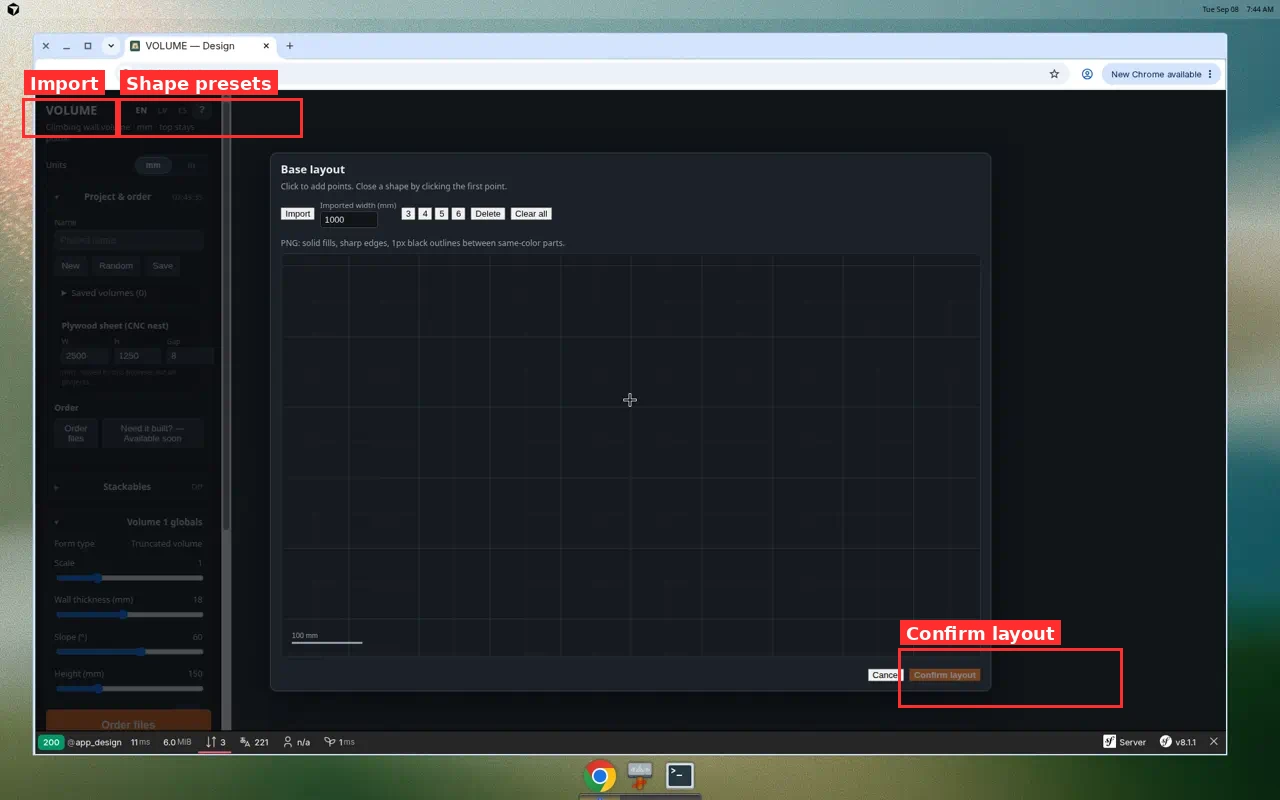
- Draw — click corners; close a shape by clicking the first (highlighted) point again.
- Presets — Triangle / Square / Pentagon / Hexagon for quick outlines.
- Import — drop or pick SVG, PNG, or JSON. Set Imported width so the real-world size matches your wall.
PNG tip (shown in the editor): use solid fills, sharp edges, and 1 px black outlines between same-color parts so VOLUME can split logo pieces correctly. Shapes must not overlap — the editor blocks overlapping regions.
4. Confirm and pick the 3D form kind
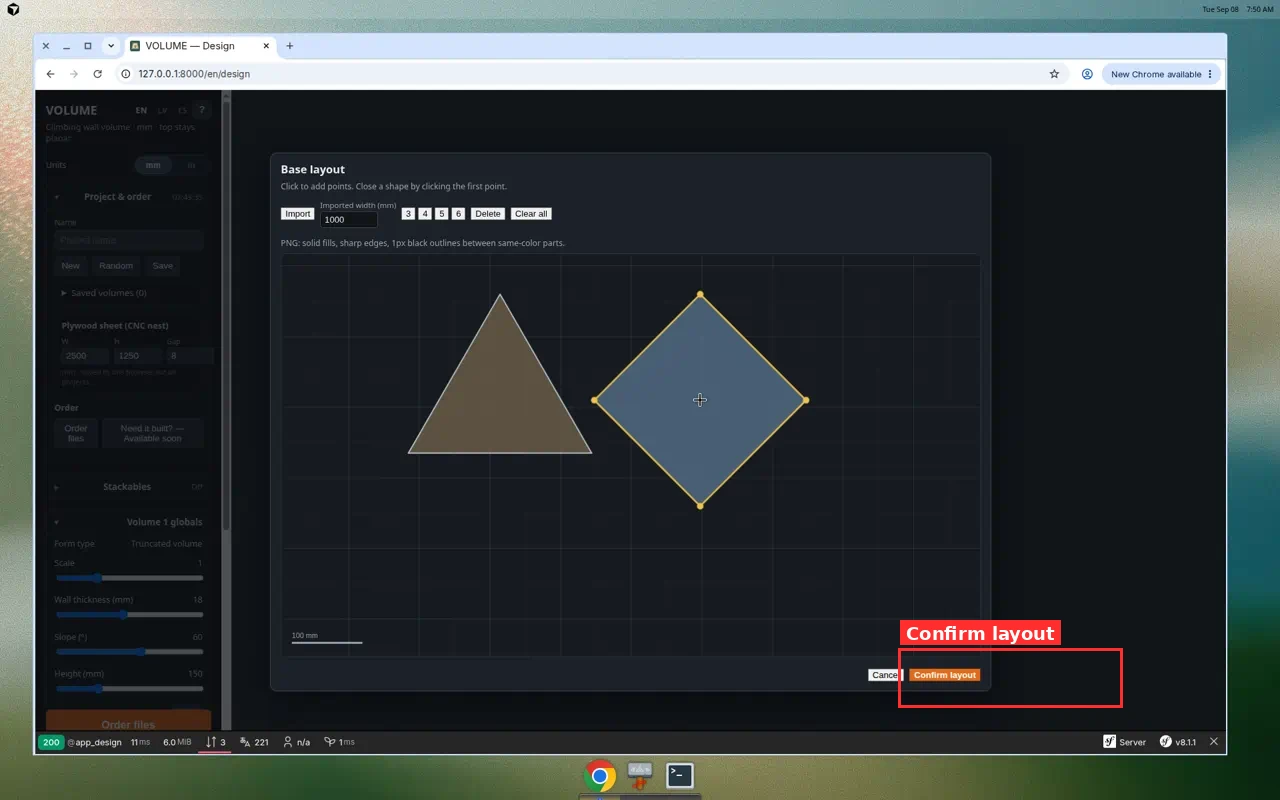
- Click Confirm layout.
- Choose Truncated volume or Pyramid for the new forms.
- VOLUME builds one independent volume per region, side by side on the shared XY plane.
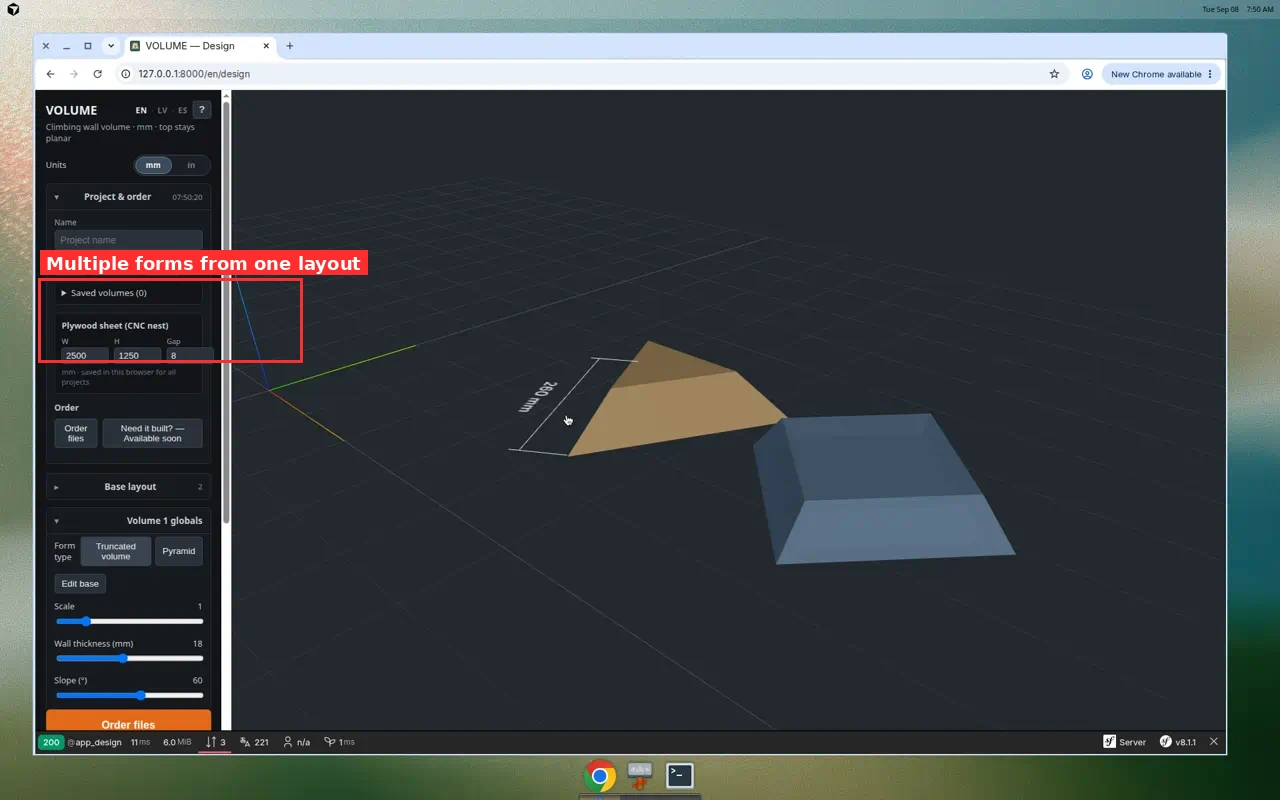
5. Tune the set
- Select each volume in the left panel to adjust height, slope, wall thickness, T-nuts, and mounting holes.
- Bottom edge lengths stay locked to the layout (shown as locked length).
- Global scale keeps the whole formation proportional.
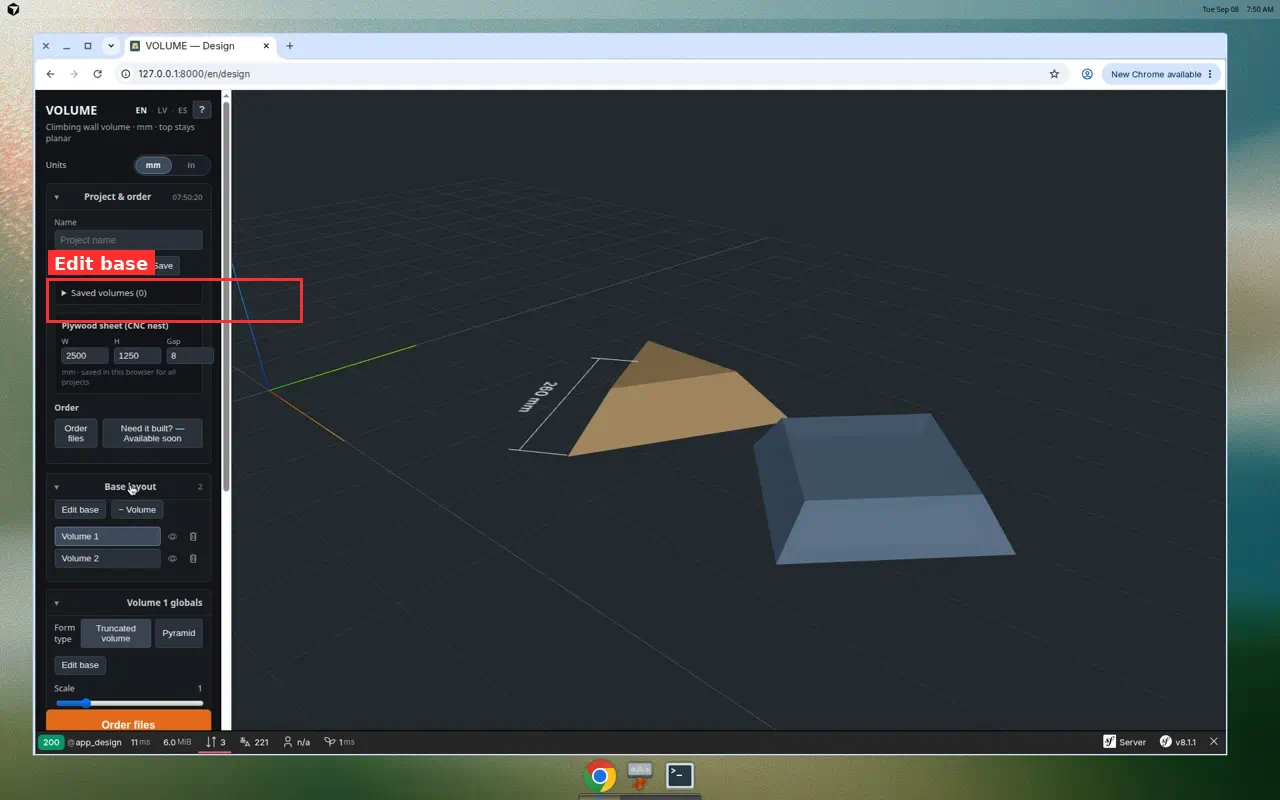
6. Edit base later
Under Base layout, click Edit base to reopen the canvas. Confirming again updates footprints while keeping form kinds where possible.
Logo / SVG checklist
- Simplify artwork to flat colour regions (no soft gradients).
- Separate touching same-colour parts with a thin black stroke.
- Import, set width in mm or inches, then confirm.
- Name the project (e.g. “Club logo set”) and Save before ordering files.
Export and build
Each layout form exports like a normal volume: print patterns, cut lists, DXF/STEP, and sheet nesting. Label pieces by volume so assembly matches the formation. See dimensions & cut lists and hand-cut vs CNC.
FAQ
Is this the same as Stackables?
No. Stackables nest volumes vertically. Base layout places several volumes next to each other from one 2D plan. See stackable guide for towers.
Can I mix frustum and pyramid in one layout?
Confirm chooses a kind for new forms. Re-edit the base when you need structural changes; tune slopes and heights per volume after confirm.
What files can I import?
SVG, PNG, and JSON polygon layouts. PNG works best for logo-style masks with flat fills.
Try it: Open the designer → New → From base layout. For leftover plywood offcuts instead of a drawn plan, use the leftover scraps guide.